How to set up Google Authorship
How to set up Google Authorship
The history of online content is about to undergo a complete metamorphosis given the concept of Google authorship. Web marketers and online analysts are looking forward to this as a markup that would embolden authenticity of available content on the web giving it a specific recognition and responsibility. From the writer’s point of view Google authorship will usher in recognition and credence to their writer ship. It is like a hall pass to gain internet listing and all the while connecting and promoting original content effortlessly. It will help screen out the ones who write relevant and original materials from the ones who do not and ensure freedom from plagiarism.
Google Authorship is reasonably easy to set up and free to use, and definitely worth the effort for any writer to gain credit and value. To set up this Google Authorship the steps are simple:
Setting up authentic Google+ account
The first step to come out from your state of anonymity is to set up the Google powered social networking platform called Google+. While setting up remember to add your own original snapshot as the profile picture. This snapshot will be flashing alongside your content whenever your area of topics or writings is hunted-down in Google world by anyone. Now this Google+ connection acts as a window or an authentic verification of who you really are. Your identity gets confirmed and connected to the rest of the e-world. It also establishes that you are a real person and not fake or spam account.
Byline on all content pages
The most important step now to claim your rightful ownership of the pages where your content appears is to make sure that each of them contains a by line with your name as it appears on your Google+ profile. This will ensure that relevant posts are brought up in your Author Stats by Google search engine. It is very important her to keep the name spelling, punctuation, etc., remain identical in both the places.
Add or link articles to G+
Now that you have set up your identity on Google, the next step is by linking your writings, blogging, etc to your G+ account. For linking the best way is to edit your Google+ profile to include a link to the site/sites you are claiming authorship on. Go to the about page of G+ and look for ‘contributor to’ section and add all the addresses you blog or write for. You can choose from current or past contributor options while adding sites.
Verification
Finally is the step for verification. This is done by adding your email address in your G+ profile. For this you need to have an email address on the same domain as your content. Now go to the ‘About’ section, and add the email address to your G+ account in the work section. This can also be accomplished through the Authorship signup page as well at https://plus.google.com/authorship
However if you do not have an email address on the same domain where you publish your writings then you can do the linking by changing the html in a very simple step. Firstly, create a link to your G+ profile from your webpage that has the content written by you on it. Go to
<a target=”_blank” href=”[profile_url]?rel=author”>Google</a>
Here replace the profile_url with your Google+ profile URL. Now add a link on your Google+ profile in the contributors section and save it so that the content for that URL specified by you is verified as been written by you.
Conclusion
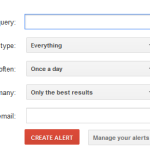
If you have followed all four of the above steps, the search results for topics of your writing area will show your snapshot, alongside your name and a snippet of the content. To test whether it is working to order there is a very easy way that is by using Google’s structured data testing tool. You can check the relevant pages of your content to see whether the author code is visible or not. To do so just enter the appropriate URLs from your site into the testing tool and watch out the outcomes.
Author Bio : Brianne Walter is a freelance journalist who has been writing about mobile technology, customer relationship management and women’s health for more than a decade. These days she is busy to contributes on getamplify


wow very nice information ,it’s more help to me.please keep posting like this.
thanks & regards
ePaxisautomation